This weekend I decided to experiment with a feature we have enabled on some of our servers that is sort of an unsung hero for advanced users (so advanced I hadn't taken the time to understand how it works!). Jekyll is a static site generator that has grown in popularity in large part due to its inclusion in GitHub Pages as well as a wider movement to have sites built from HTML based on Markdown templates. Plenty of folks today already run Jekyll sites but the process of using them with Reclaim typically involved generating the files locally on your computer and then publishing them to Reclaim because of Jekyll's requirement to run newer versions of Ruby than cPanel supports.
On many of our servers we now run a piece of software called CloudLinux. While the primary purpose of this software is to handle resource allocation (CPU/Memory/IO) per account, it comes with a stellar list of other features that allow a user to choose alternative versions of PHP, Python, and Ruby for their account. Python and Ruby are not languages I've played much in but I figured this was a perfect opportunity to see if I could install Jekyll and get it to run right inside my Reclaim Hosting account to remove some of the barriers to using it. And I'm happy to say I was successful! Here's how it works.
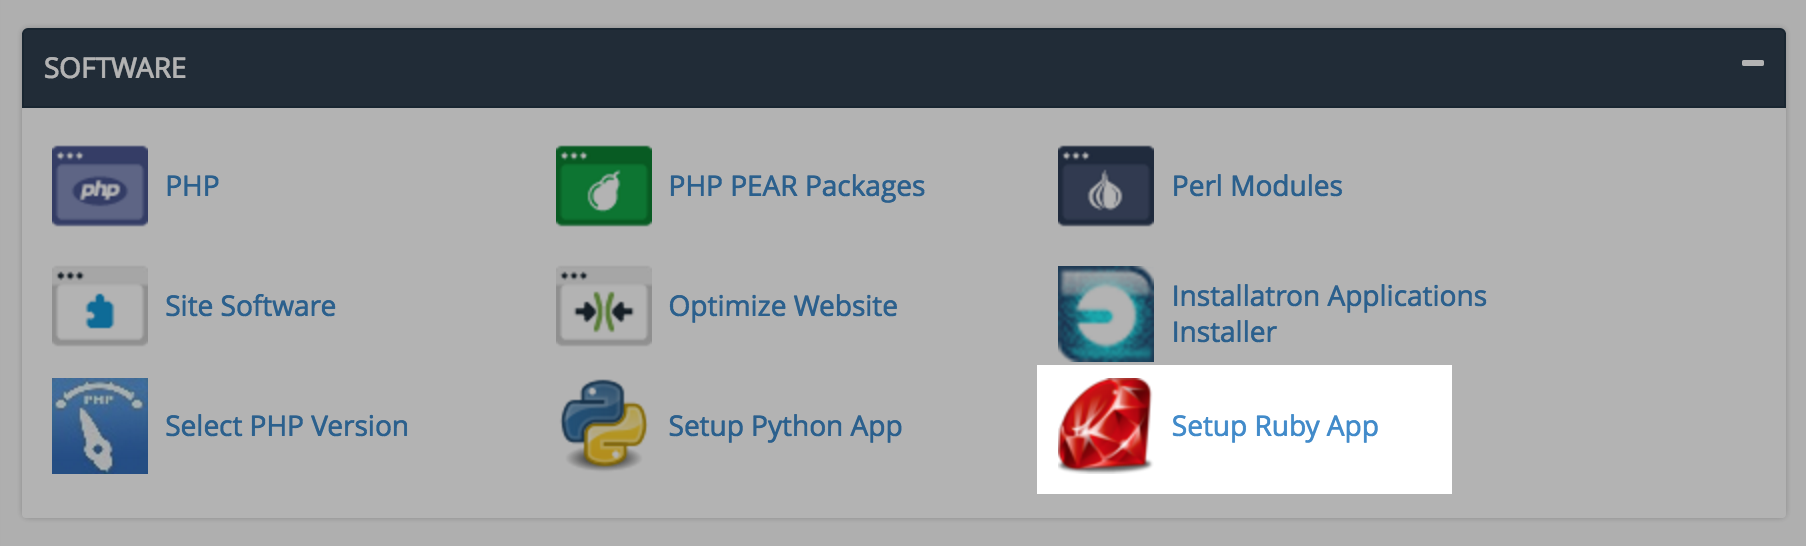
Looking at the requirements in the Jekyll install guide you'll note that Ruby 2+ is required (thankfully Jekyll 3 no longer requires NodeJS which would have been a dealbreaker here). So to start we'll create a Ruby application within cPanel under Software > Setup Ruby App
For the version I've chosen the latest available here, Ruby 2.2, and setup jekyll folders for the application contents and the public directory.
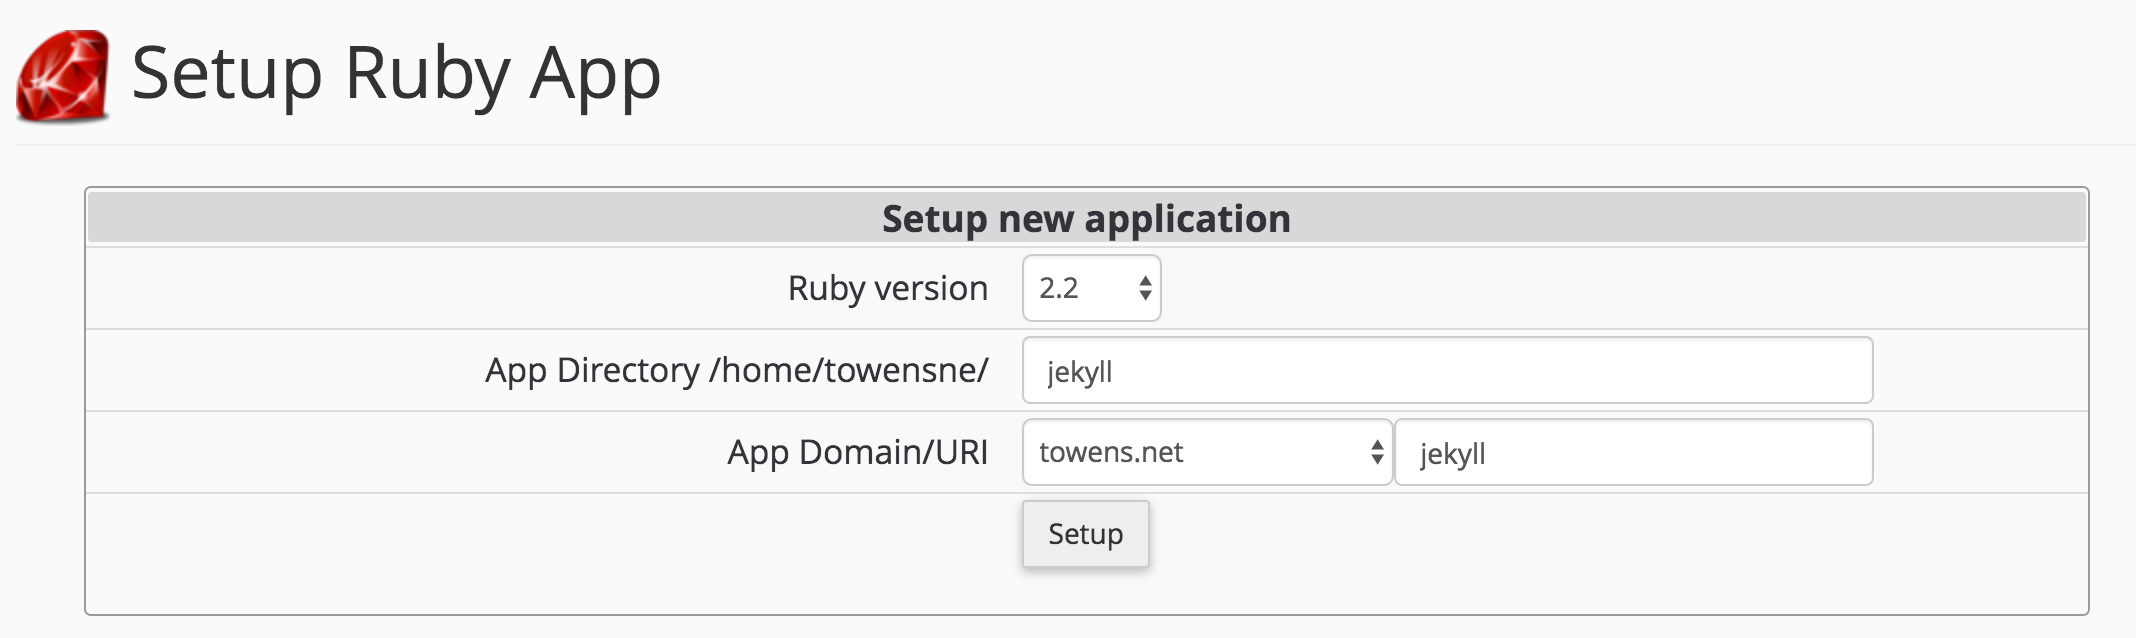
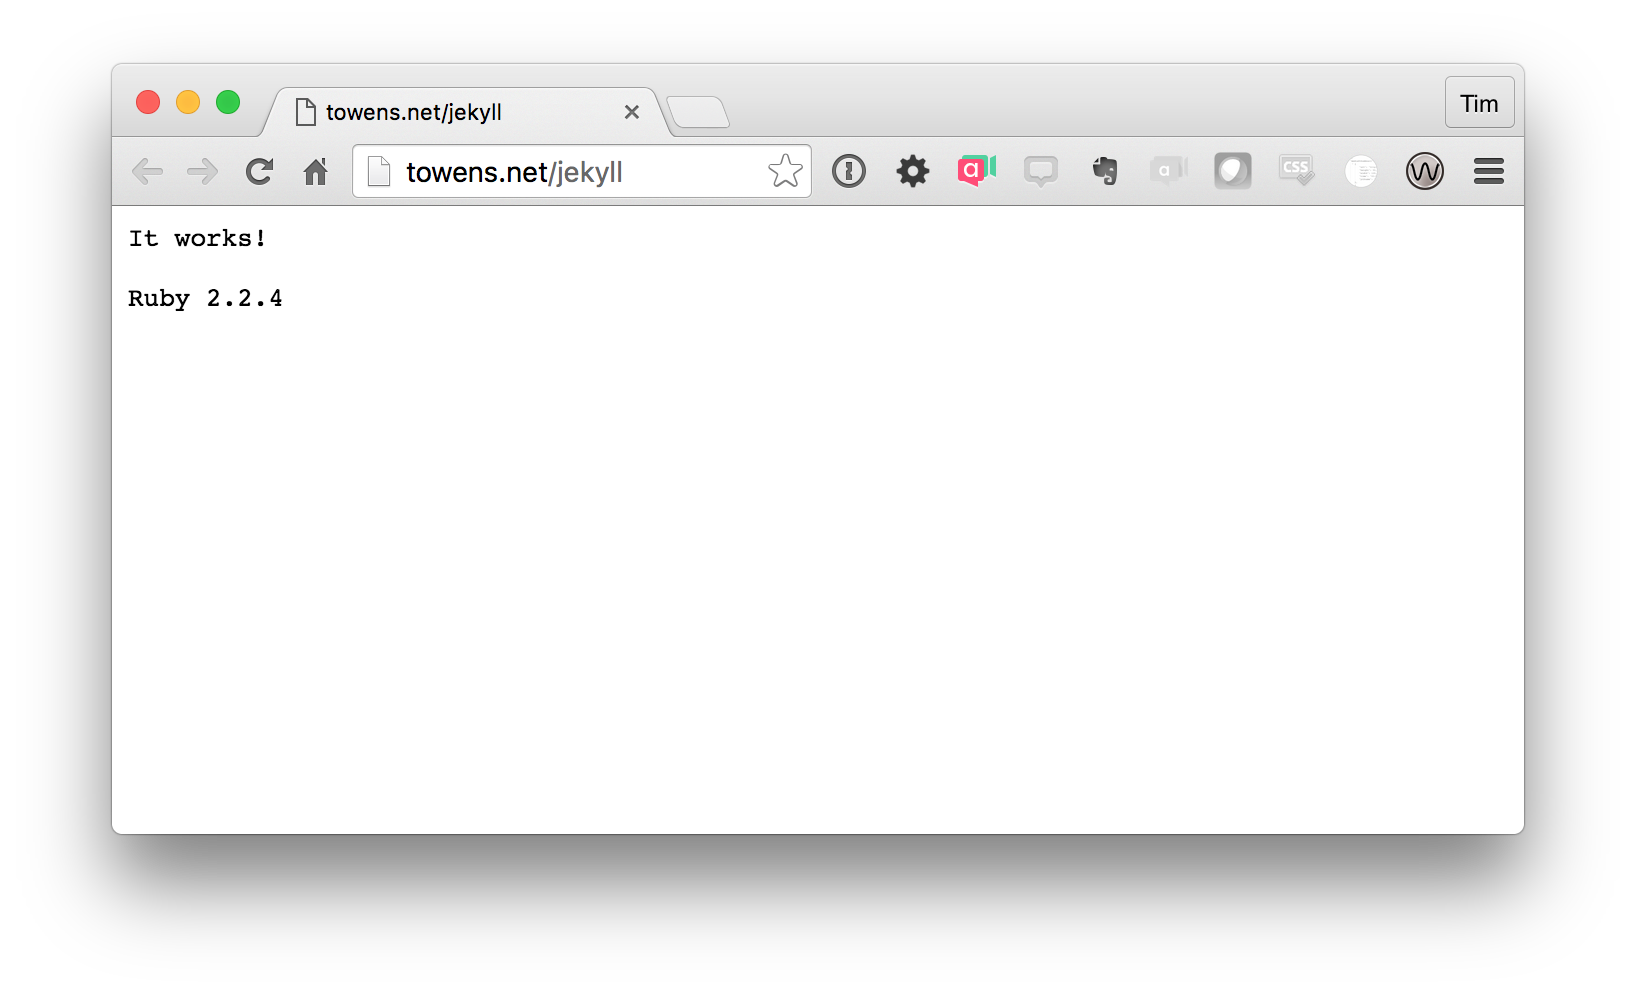
Click Setup and you'll have a generic Ruby application ready to go! Of course there's nothing there yet, it simply displays some basic information in cPanel and the URL shows a simple Hello World style page letting you know it's running.
The next step according to the install guide for Jekyll is to use the RubyGems installer to run gem install jekyll. Here's where things get interesting. You'll need to login to your shell account for these next steps, something we include by default with our accounts. But if I just login and try to run that command I get the following error:
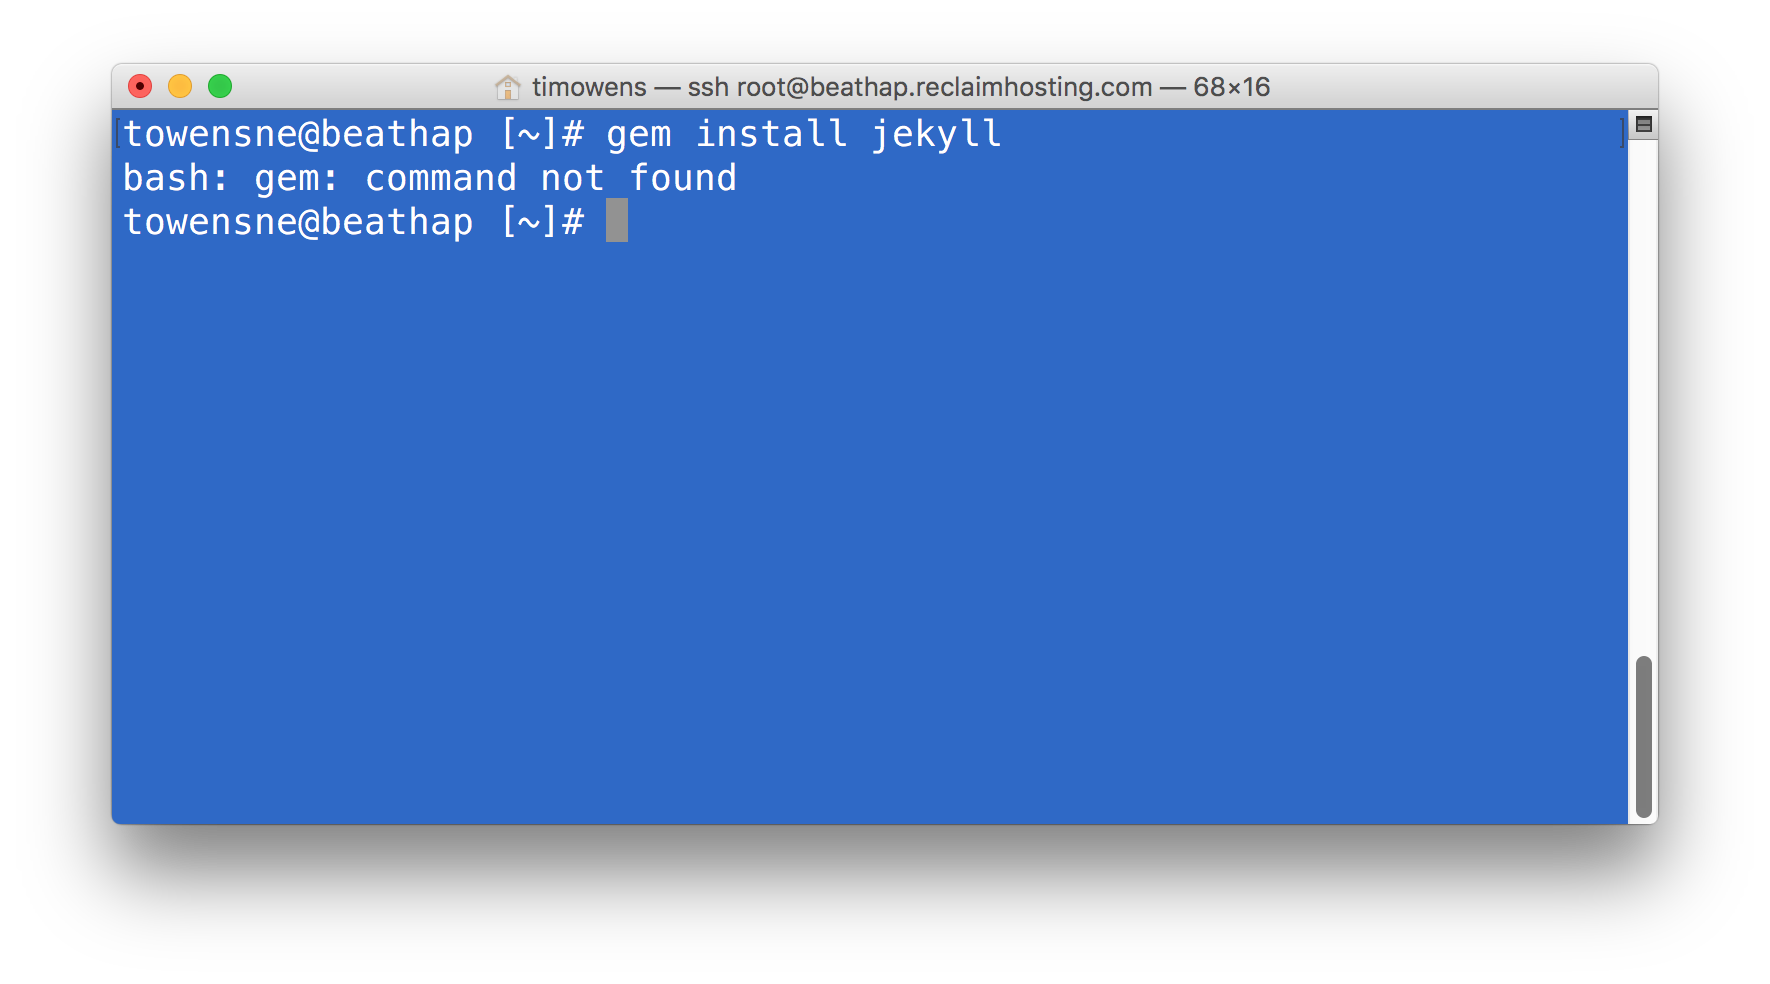
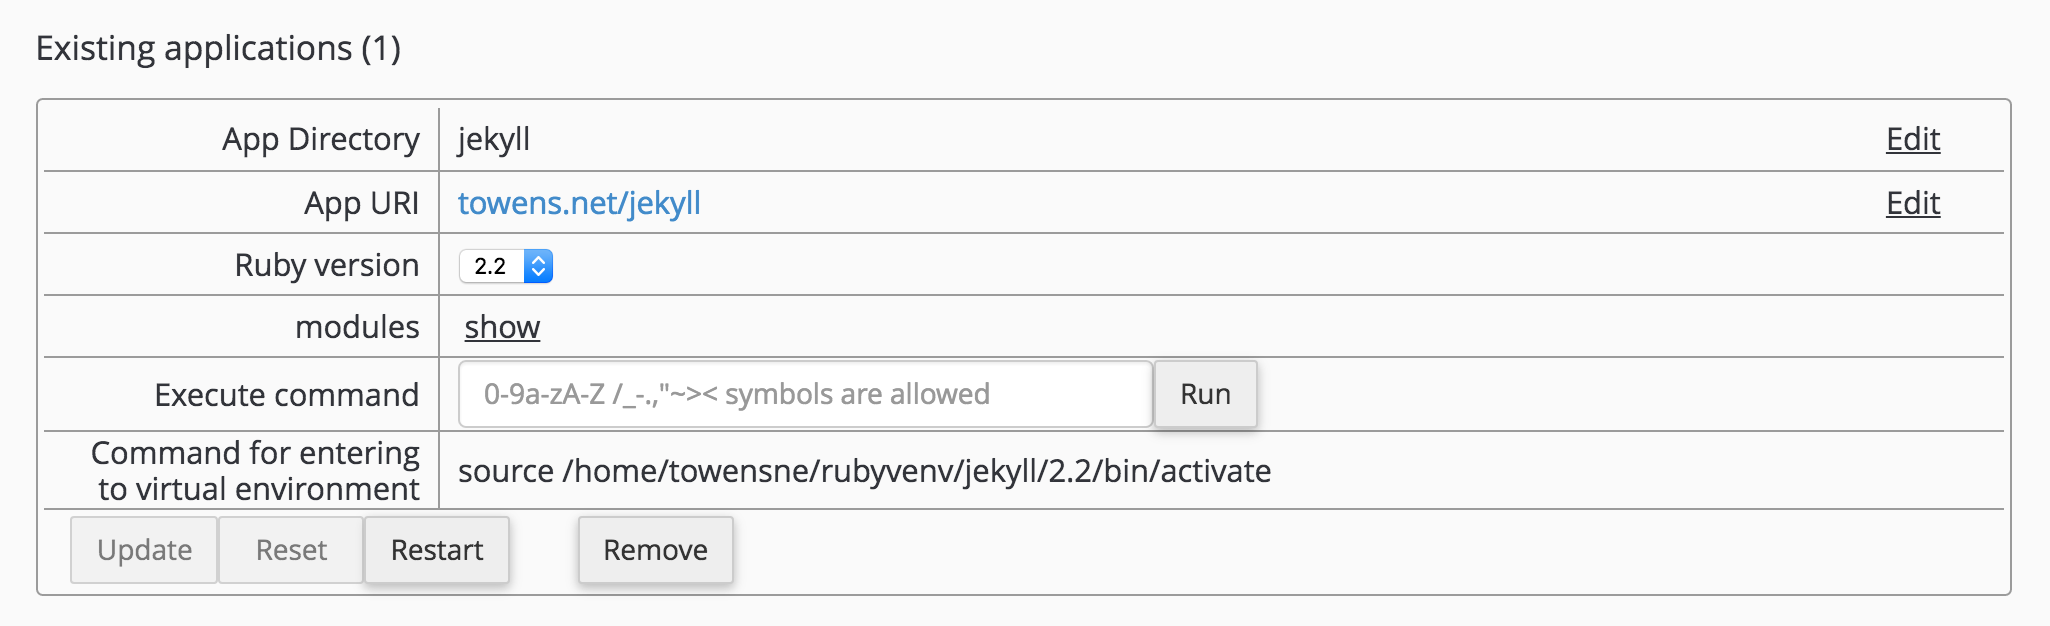
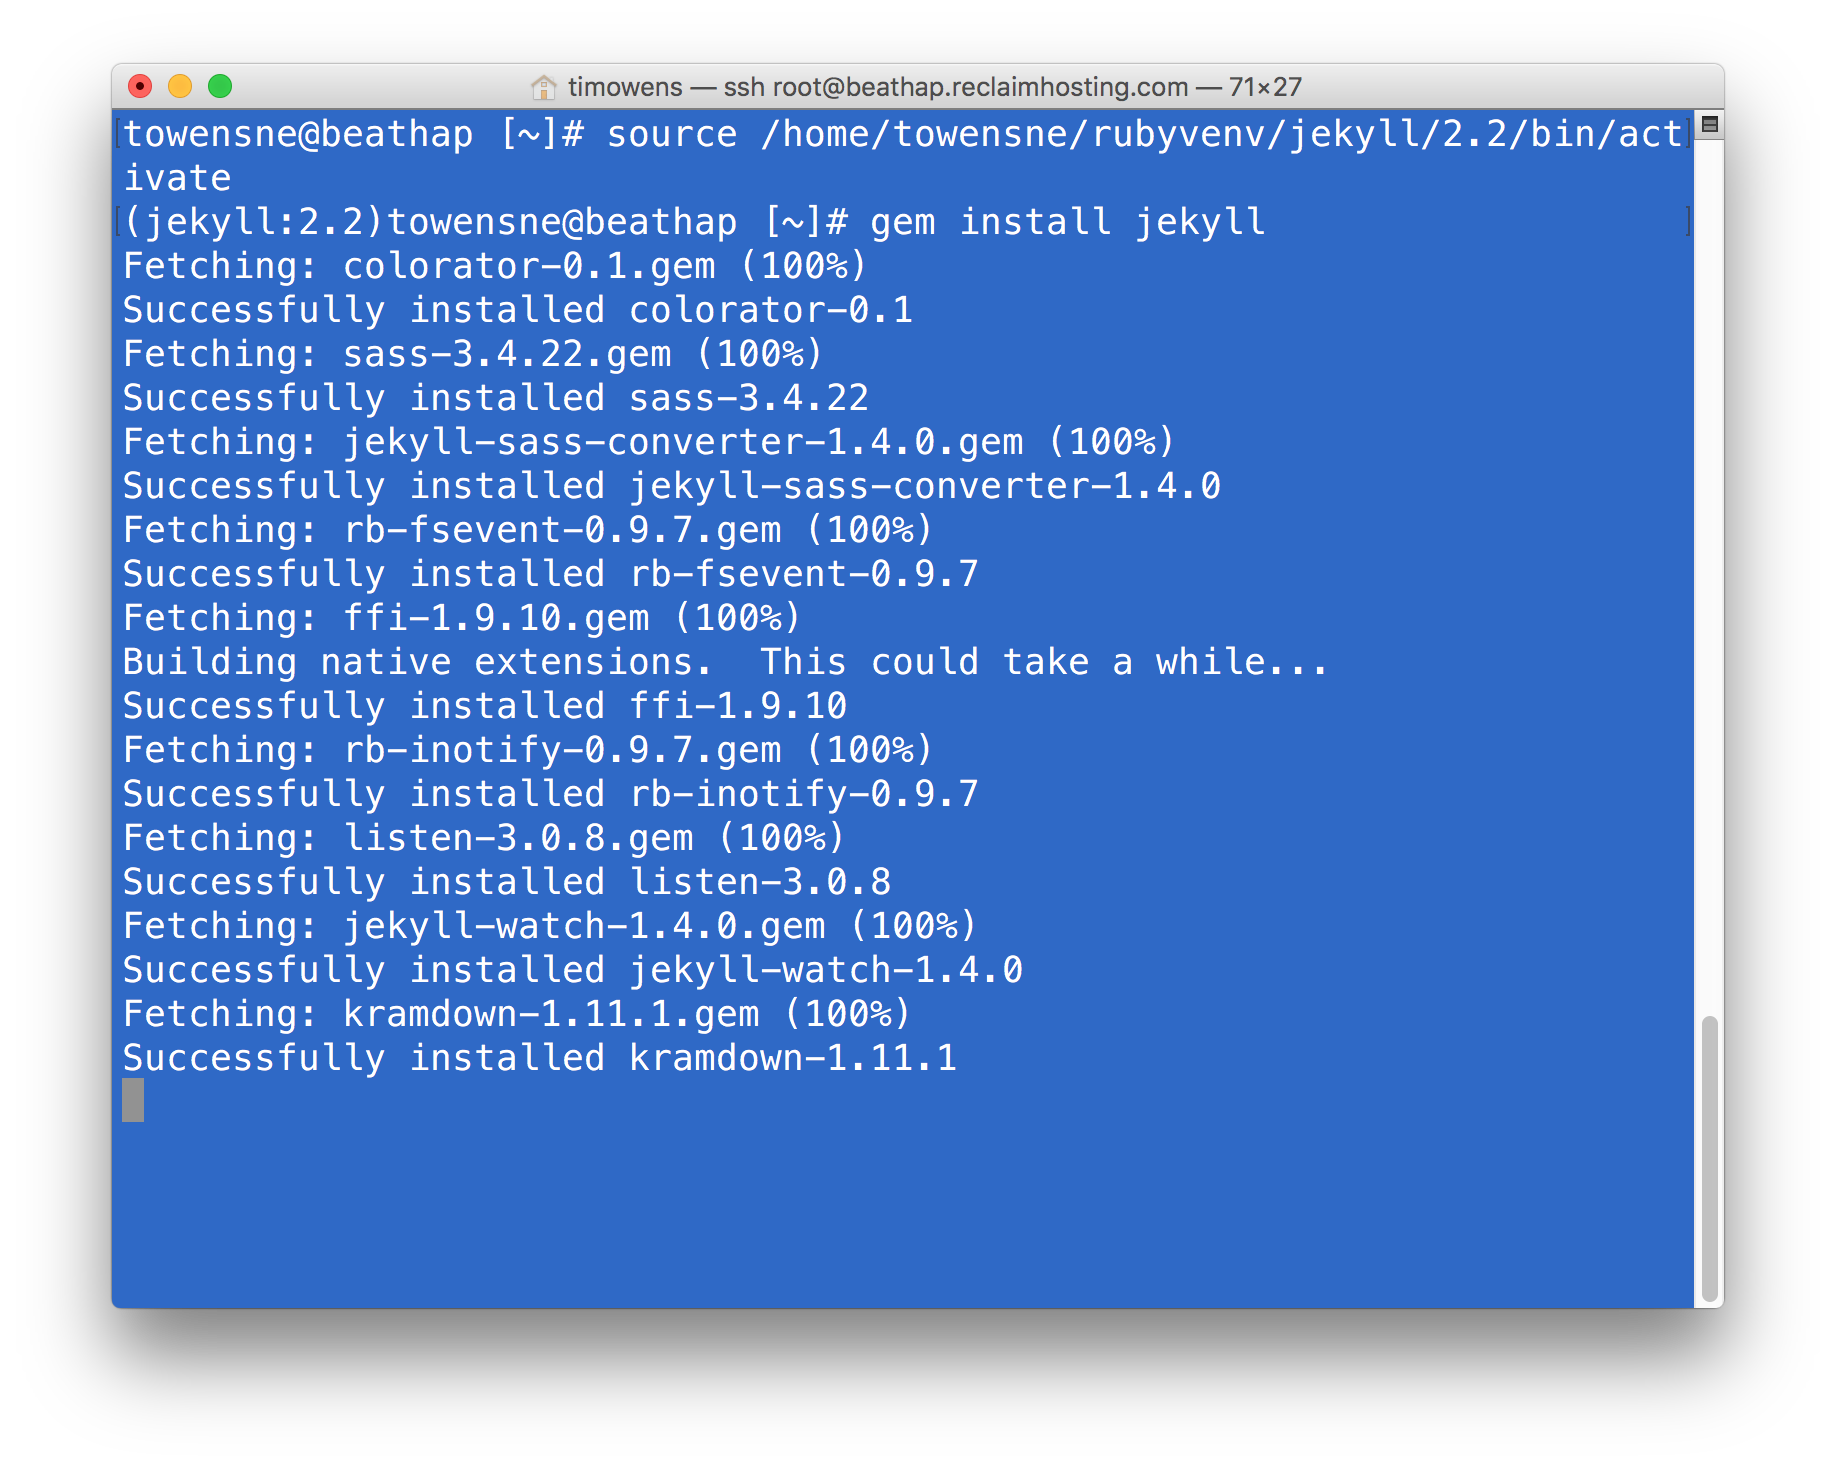
This is because your Ruby application runs in a virtual environment that allows you to run different versions for different applications. So in order to work within our app we need to enter the virtual environment before doing anything else. If you look back at the application details a command was provided for entering the virtual environment, in my case source /home/towensne/rubyvenv/jekyll/2.2/bin/activate. So I'll enter the environment first and then run the command gem install jekyll from there.
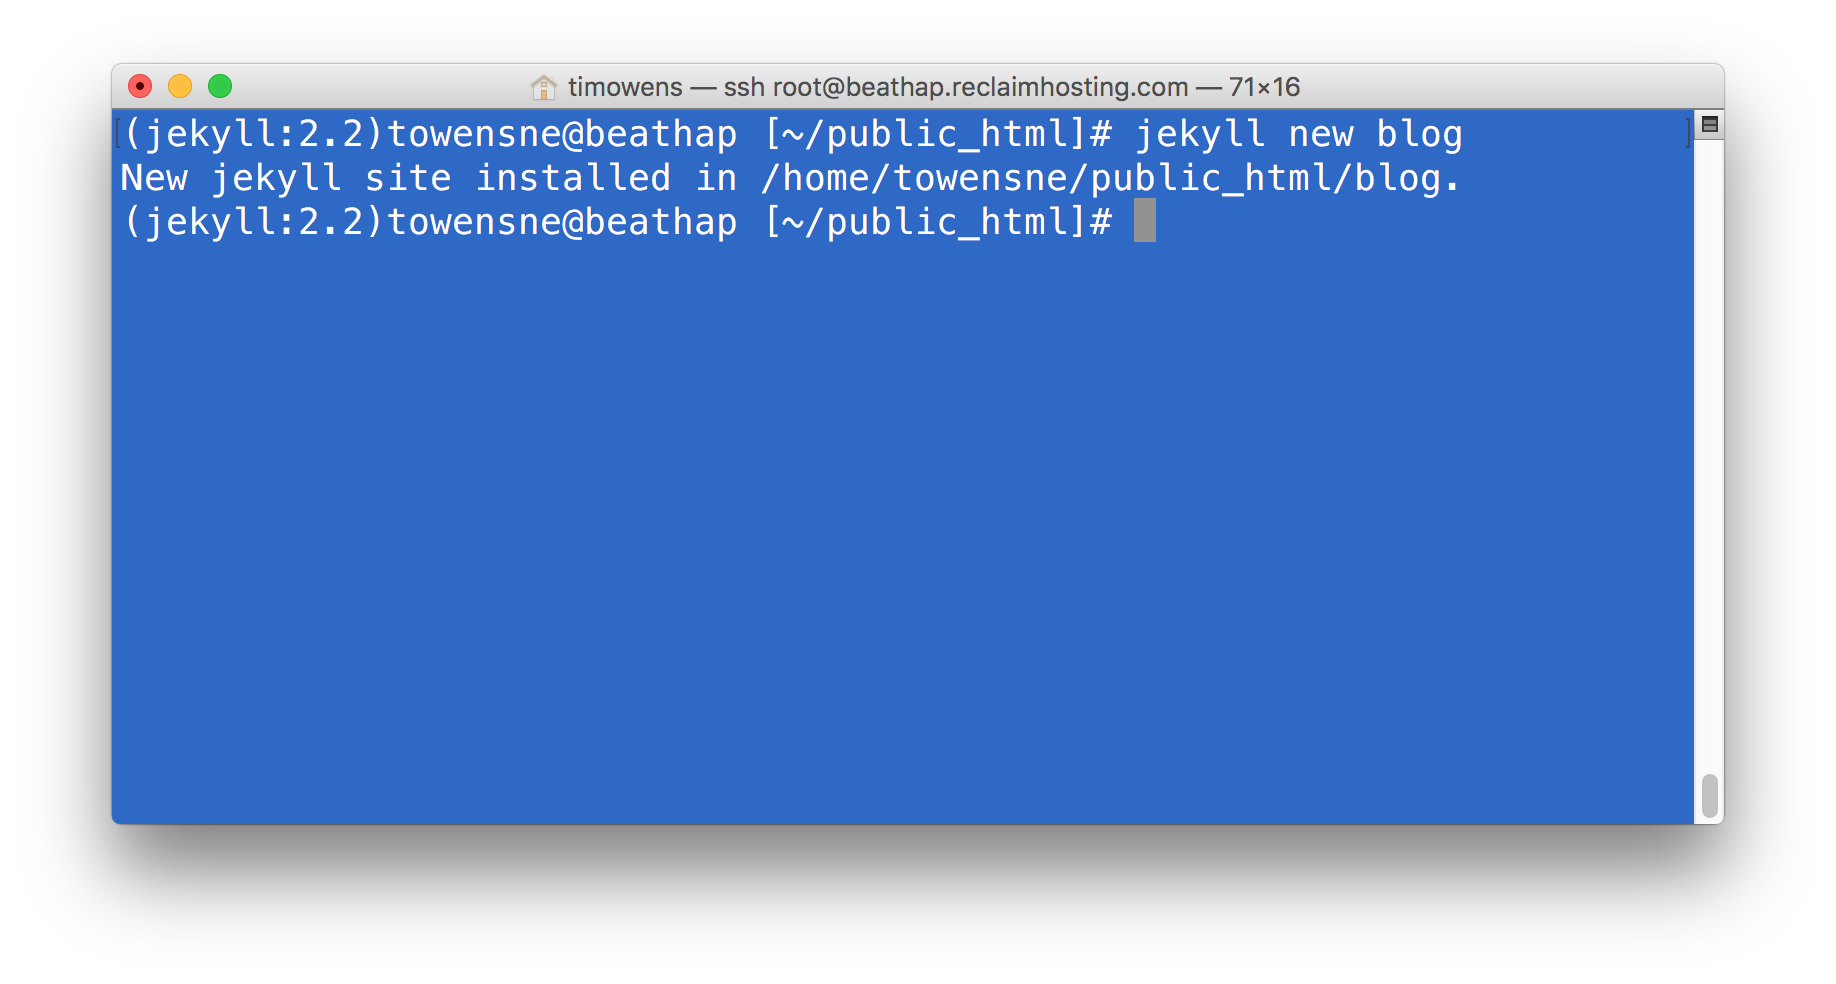
Now we're cooking! We've got Jekyll installed in our account and should be able to use it to build a site. At this point I could grab a theme from somewhere but Jekyll also has a built-in site generator tool that can be used by running jekyll new myblog where myblog is the name of the folder you want it to create. In this case I'll navigate to my public_html folder (cd public_html) and run jekyll new blog to setup a blog folder for it. Keep in mind I need to stay in my virtual environment while doing this. The Jekyll command will not exist outside of it.
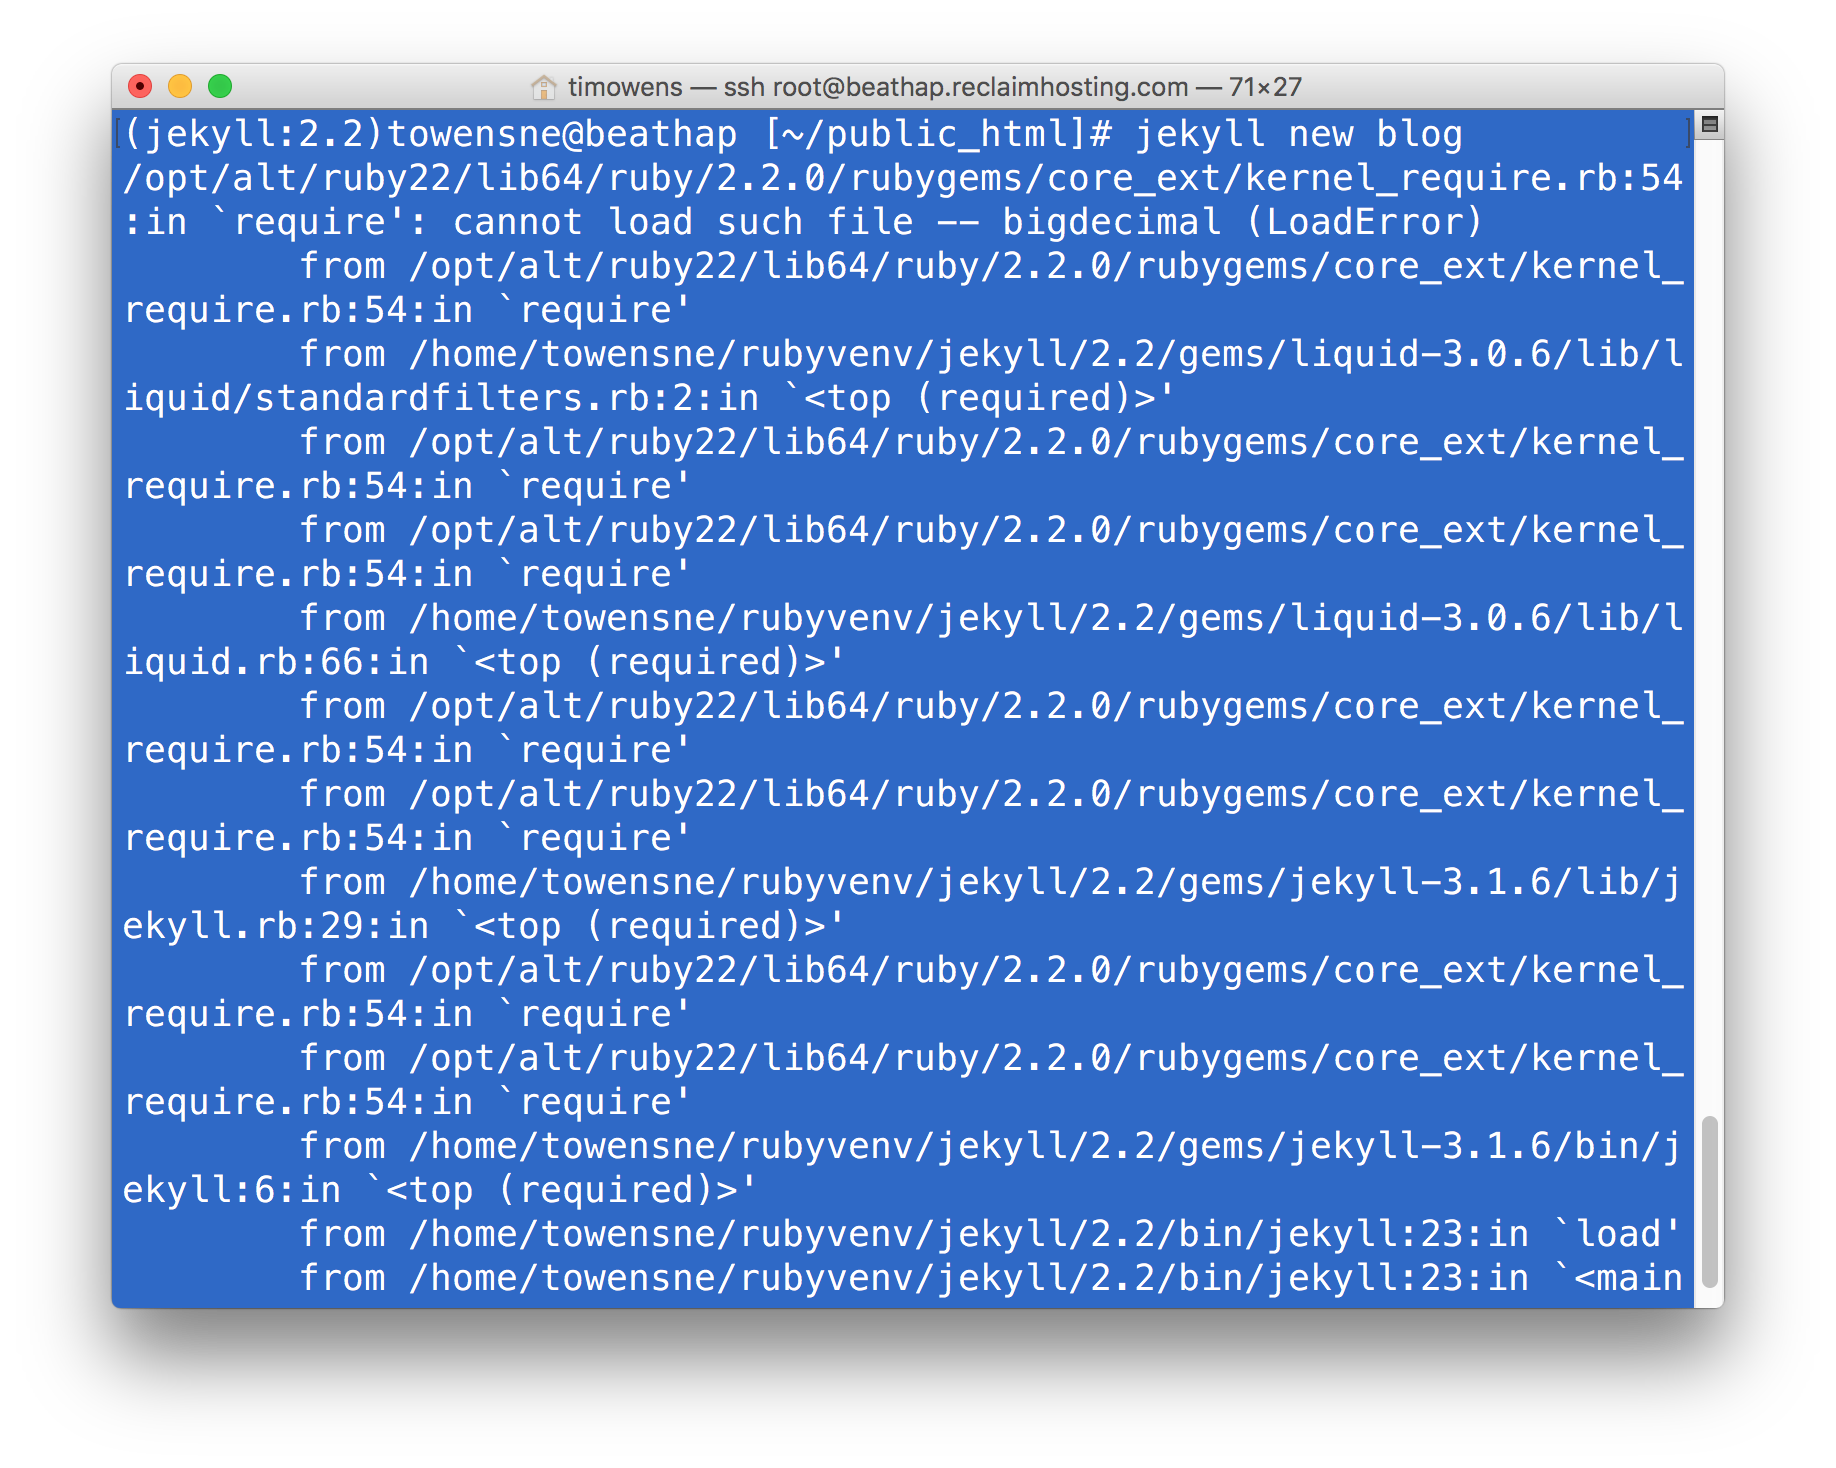
Yikes, ugly Ruby error. But have no fear, this is a pretty straightforward one to deal with. Our Ruby app is complaining that it needs something called "bigdecimal" in order to run. Similar to how we installed Jekyll we can just run gem install bigdecimal to get that package in place.
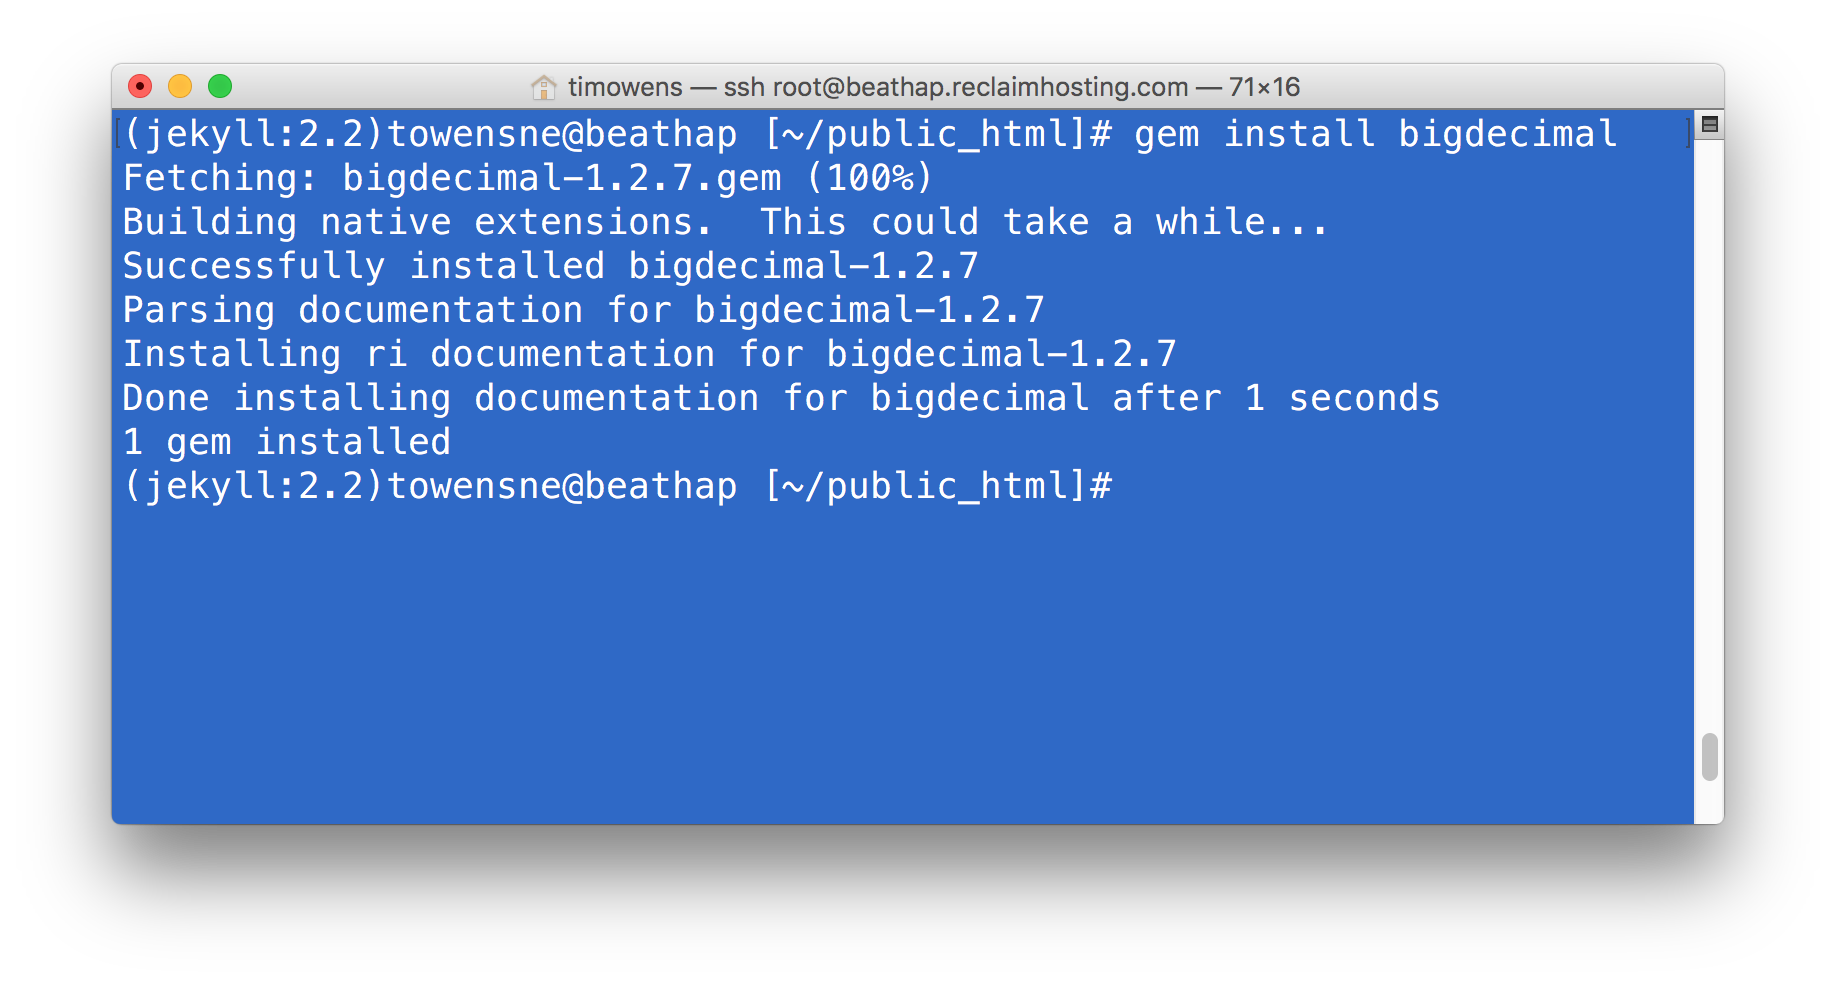
And now let's setup that blog again.
Score! If we look at the blog folder in our File Manager we'll have a better idea of what this looks like. This isn't meant to be a comprehensive introduction to Jekyll by any means, but you'll notice lots of folders and files in there and this structure is essentially a basic Jekyll site.

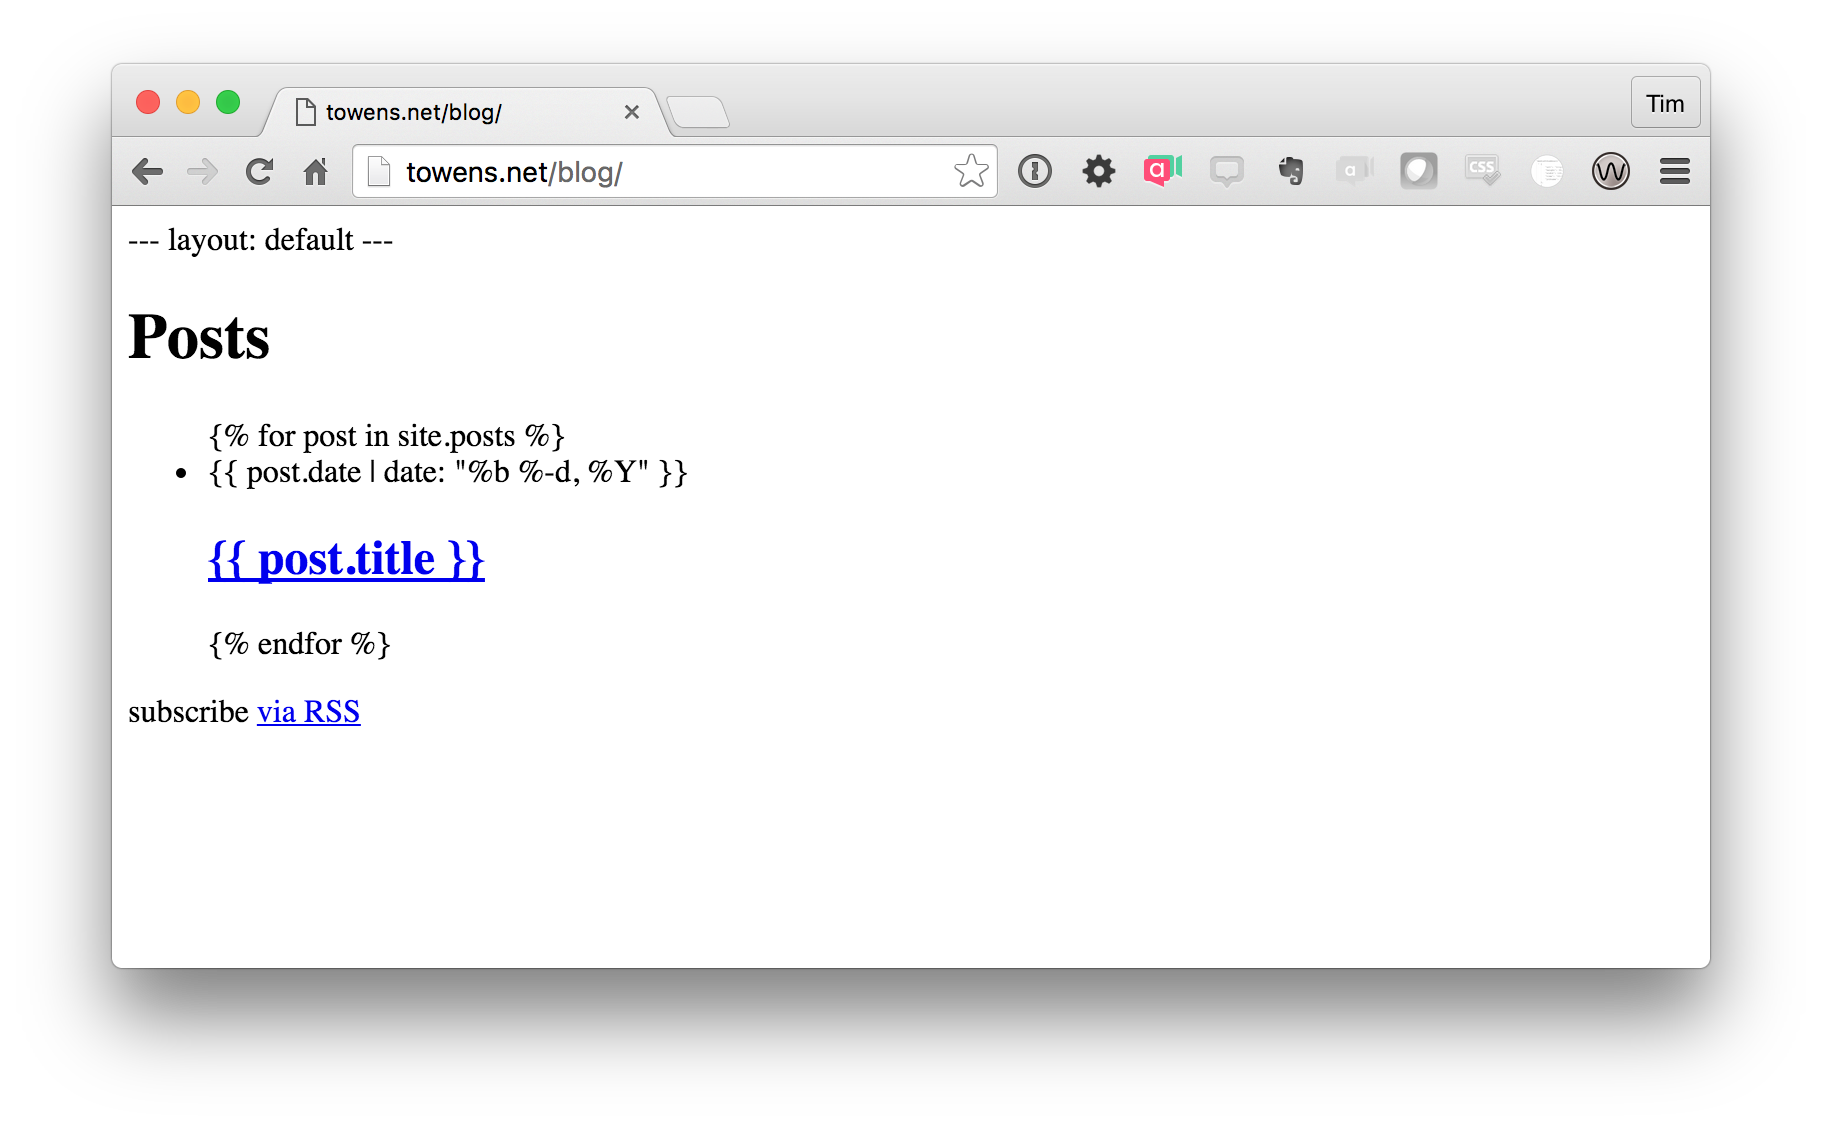
Now we've got our Jekyll site structure done but it's important to note that we haven't generated the HTML for the site yet. In fact if we go to towens.net/blog where I put this site you'd see just a bunch of code.
We need to run Jekyll's site generator in order for it to convert all the markdown and templates into a static HTML site. This is done back in our shell session by running jekyll build (make sure you change to your blog directory)
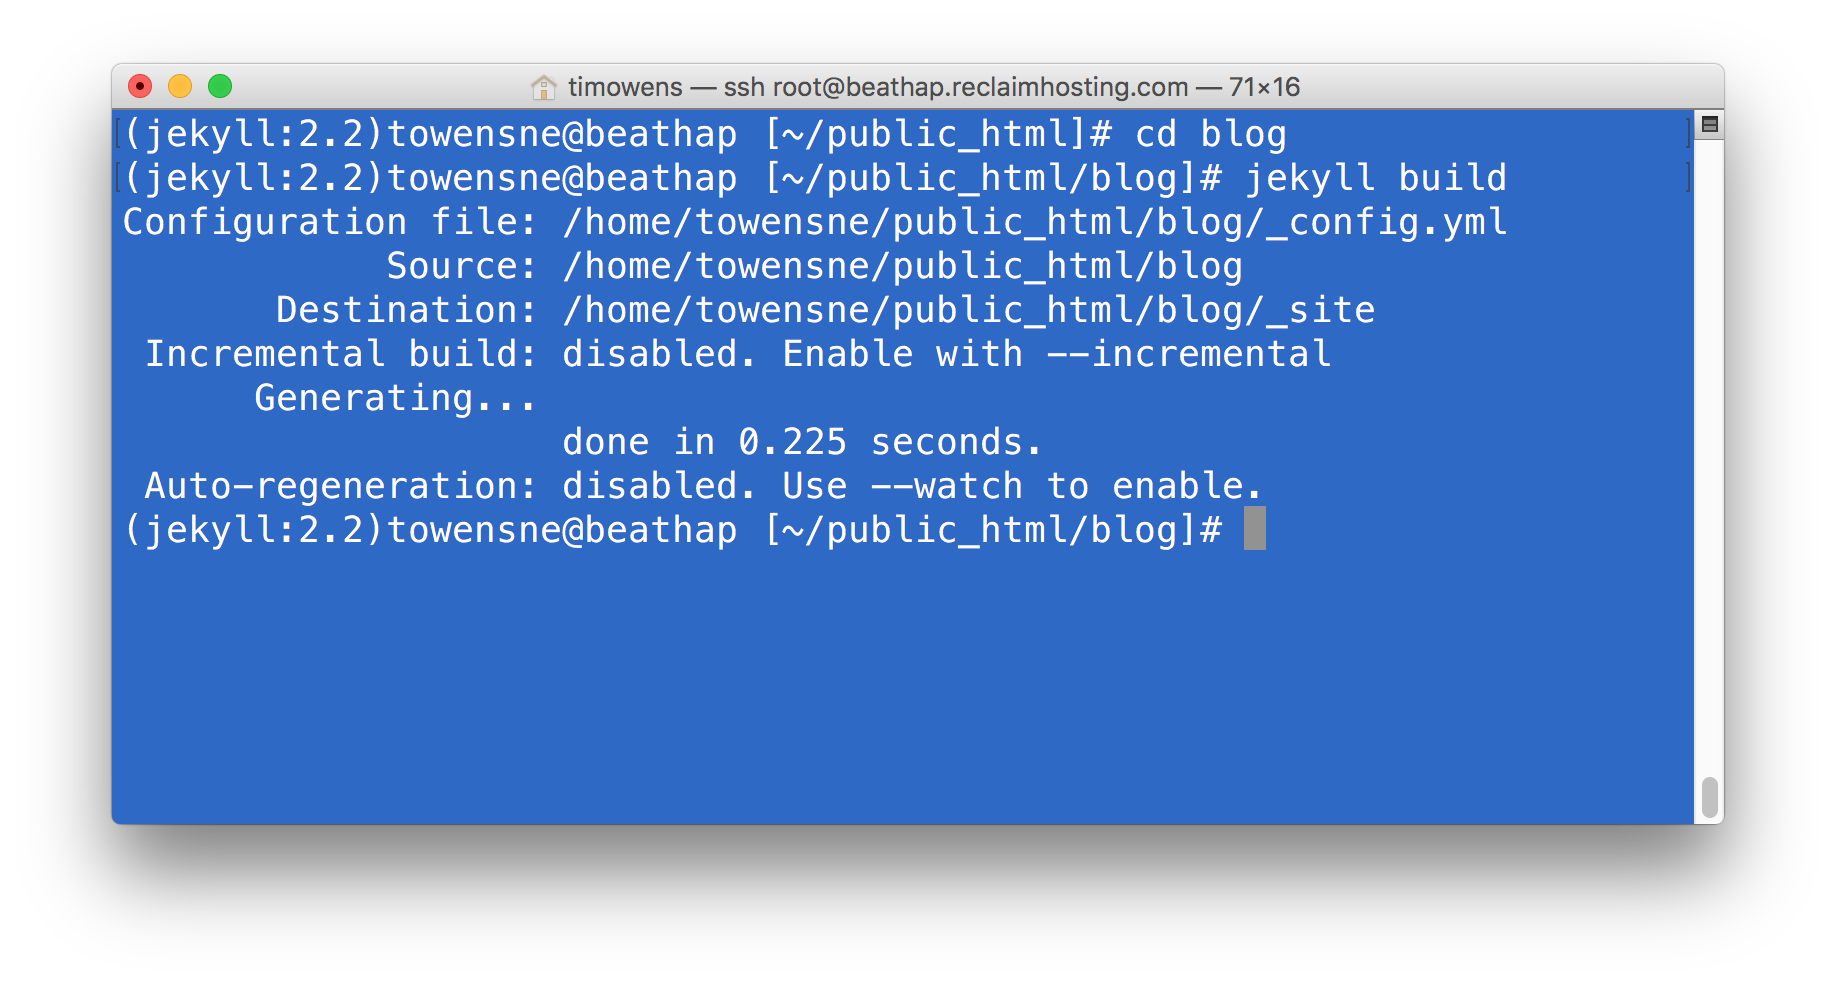
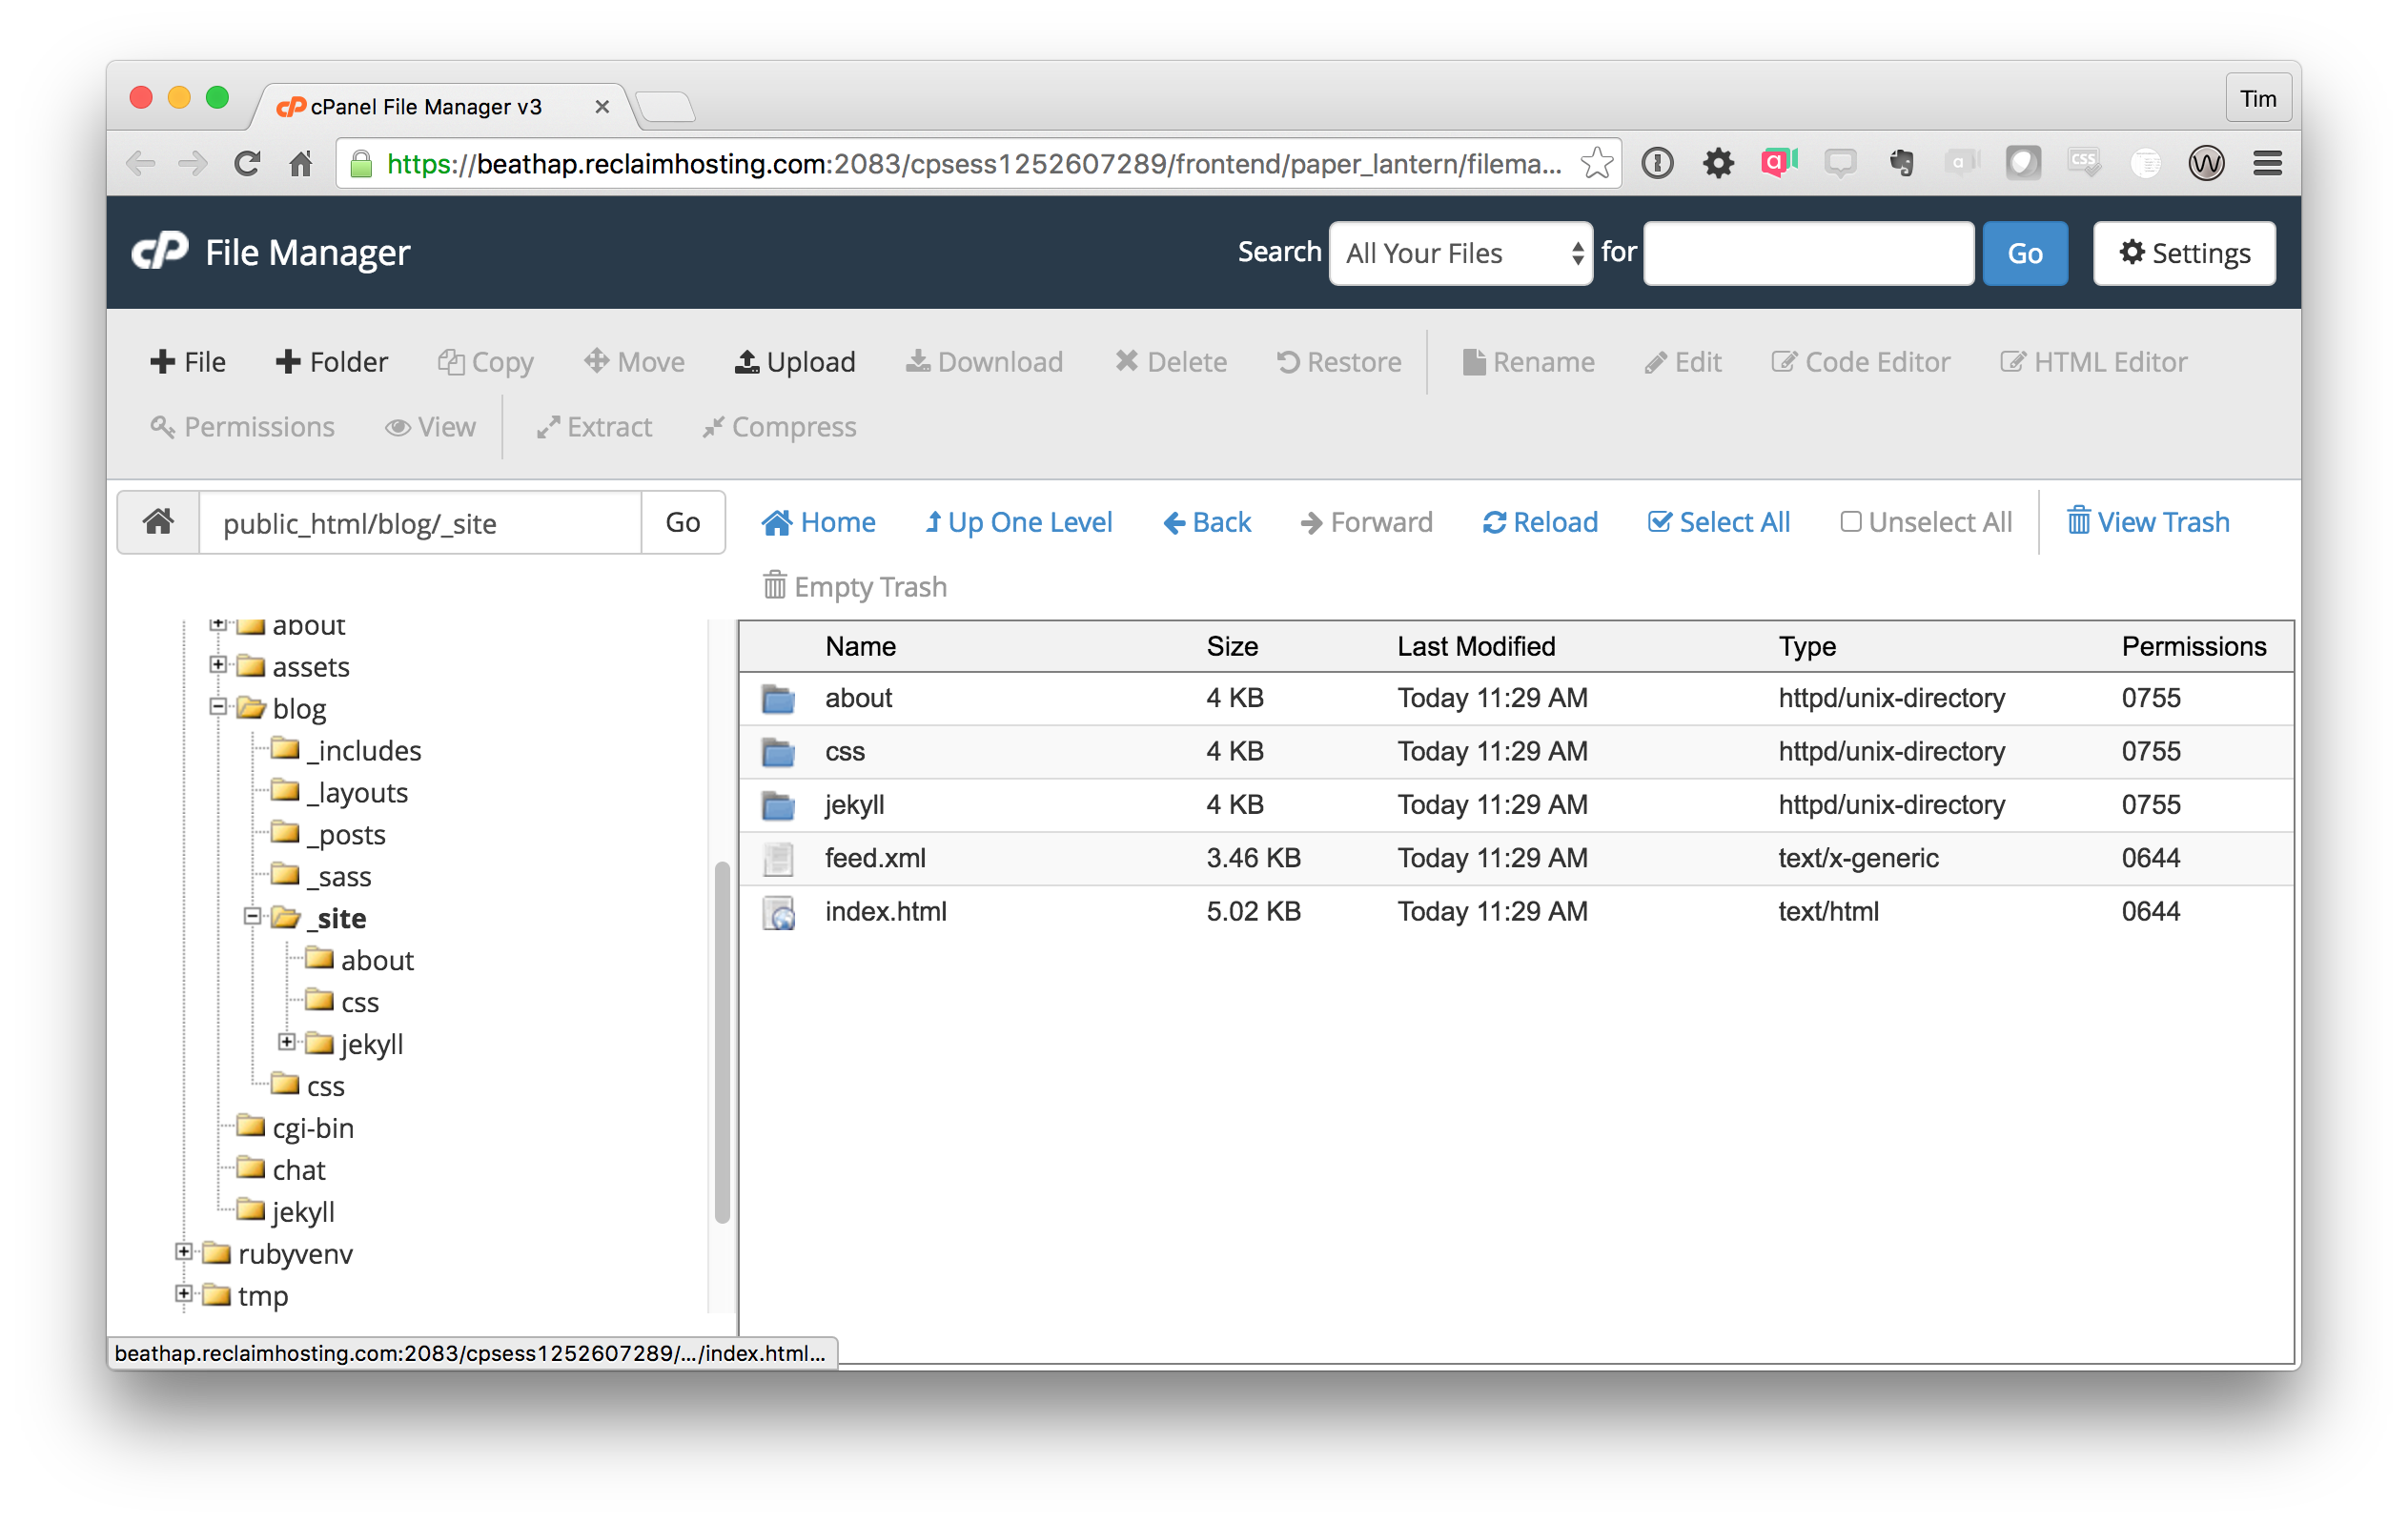
What this does is takes all those templates and turns it into an actual HTML site. From the printout you can see the site is generated in the _site folder (you can specify a different name for the folder using the --destination parameter, read more about the options at https://jekyllrb.com/docs/usage/). If we look at the _site folder you'll notice this looks a lot more like a regular HTML site than the Jekyll folder did.
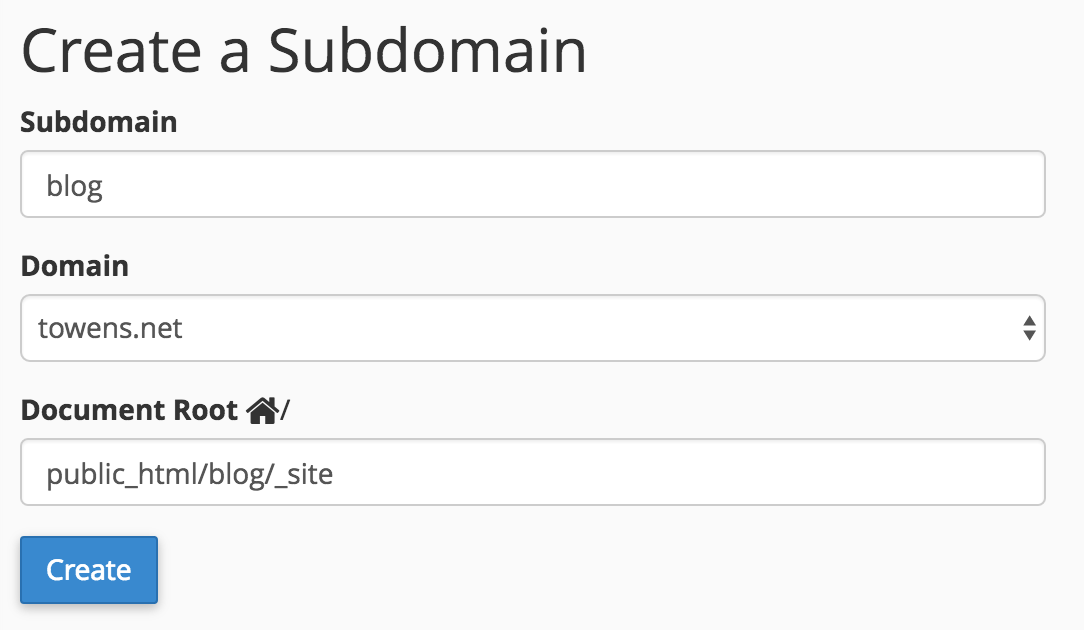
Our last step is to setup a URL for the generated files and for this I'm going to create a subdomain in cPanel under Domains > Subdomains. I'll give it the subdomain blog.towens.net and we know that the files we want to server are in public_html/blog/_site so I'll set that as the Document Root for the subdomain.
Now if we've done everything correctly we should be able to load blog.towens.net and get our Jekyll site.
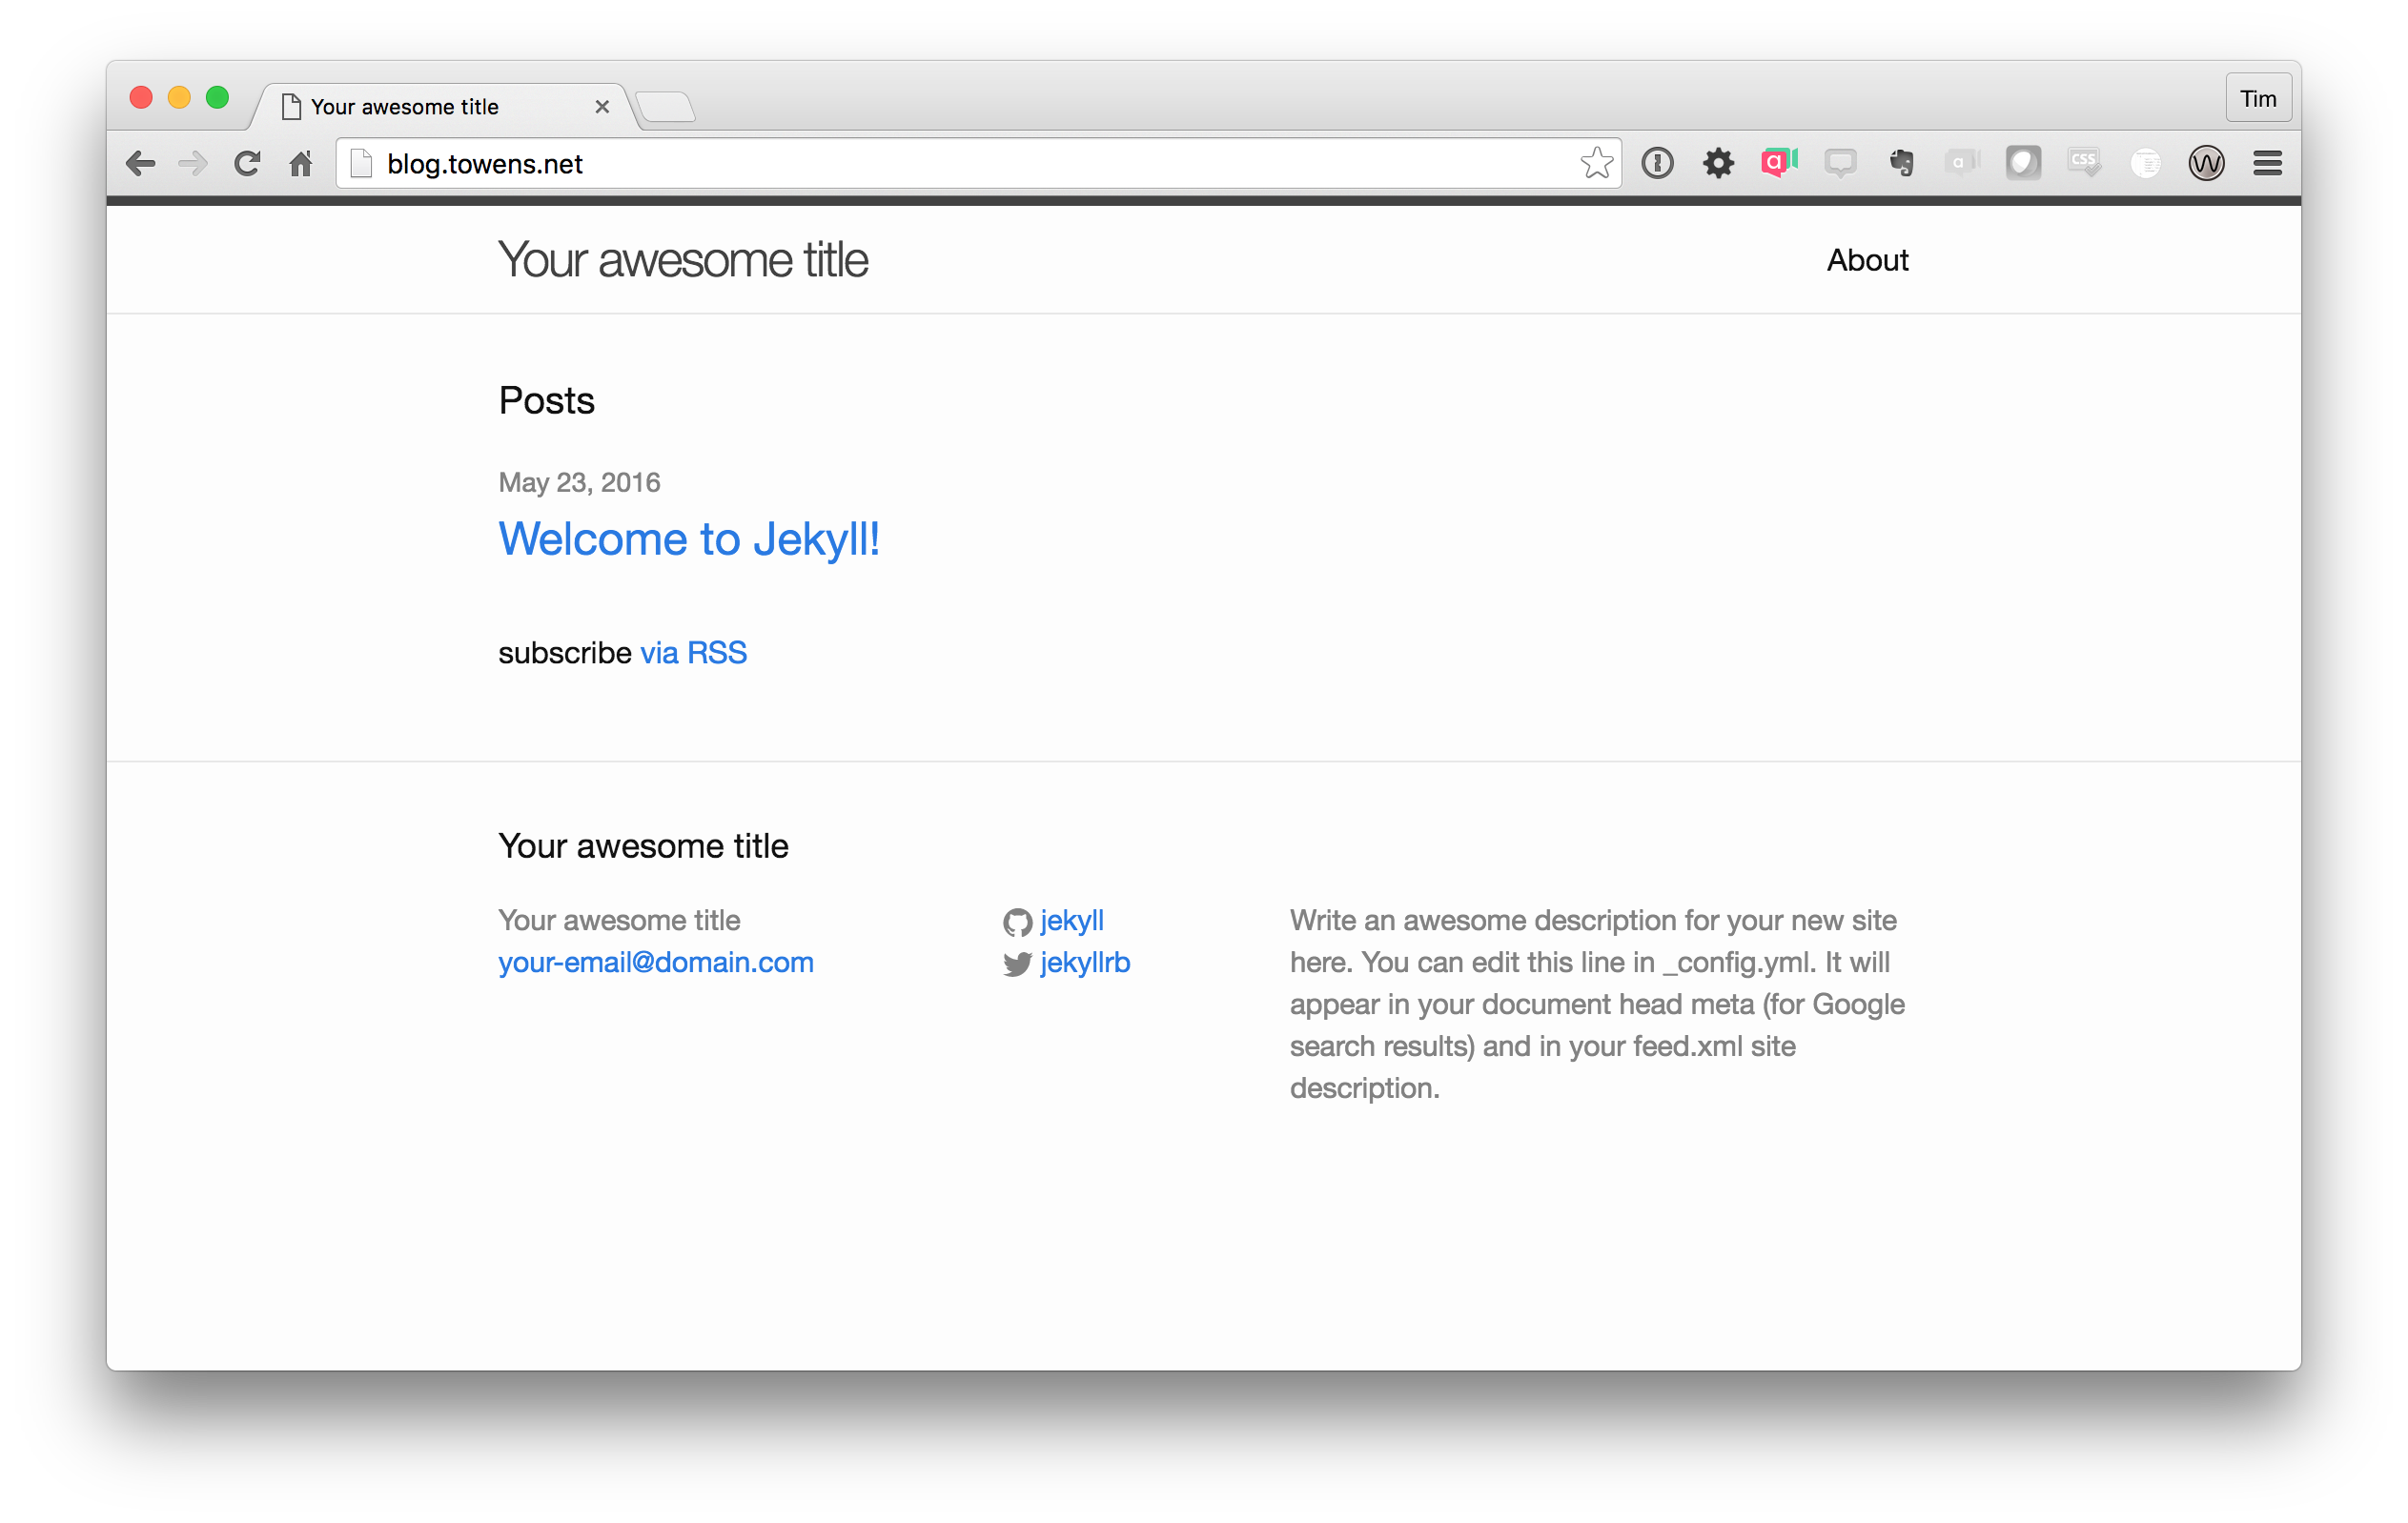
Booyah! Now all we need to do anytime we make changes to the Markdown files in our Jekyll directory is running jekyll build to rebuild the site. It will update _site with everything each time. For extra credit it's possible to setup a cron job that will schedule and run a build every X minutes. The command would look like this: source /home/towensne/rubyvenv/jekyll/2.2/bin/activate && cd /home/towensne/public_html/blog && jekyll build (obviously you'd need to replace the first part with the command to enter your virtual environment and update the path it changes the directory to).
So that's it! Certainly more advanced stuff than just publishing via WordPress or something like that but I know a lot of folks who have been itching to try Jekyll or use it more with their account and this is a great way to run it as a Ruby application directly from your Reclaim Hosting account without having to do all the building locally and publish the files as an additional step.